Sunday, January 15, 2012

Fall leaf cookies

I love this sugar cookie recipe. The best part about it is you don't have to refrigerate the dough before using cookie cutters!


Ingredients:
1 cup margarine
1 large egg
2 tsp. baking powder
1 cup sugar
1 tsp. vanilla
3 cups plain flour
Food coloring

-Preheat oven to 350 degrees
-Cream margarine and sugar in large bowl with electric mixer
-Beat in egg and vanilla, add baking powder
-Add flour one cup of a time-blend last cup of flour by hand. Do not chill dough.
-Divide dough into the number of colors you would like to use. Mix food coloring in to each individual ball of dough
-Take pieces of the colors you want to use and place beside one another and then roll out
-Use cookie cutter and tear away excess dough
-Add more dough of the colors you want to use and cut out shapes. Repeat until all dough is used
- Bake on middle shelf of oven for 8 mins or till lightly brown. Watch very carefully to make sure they don't over cook!
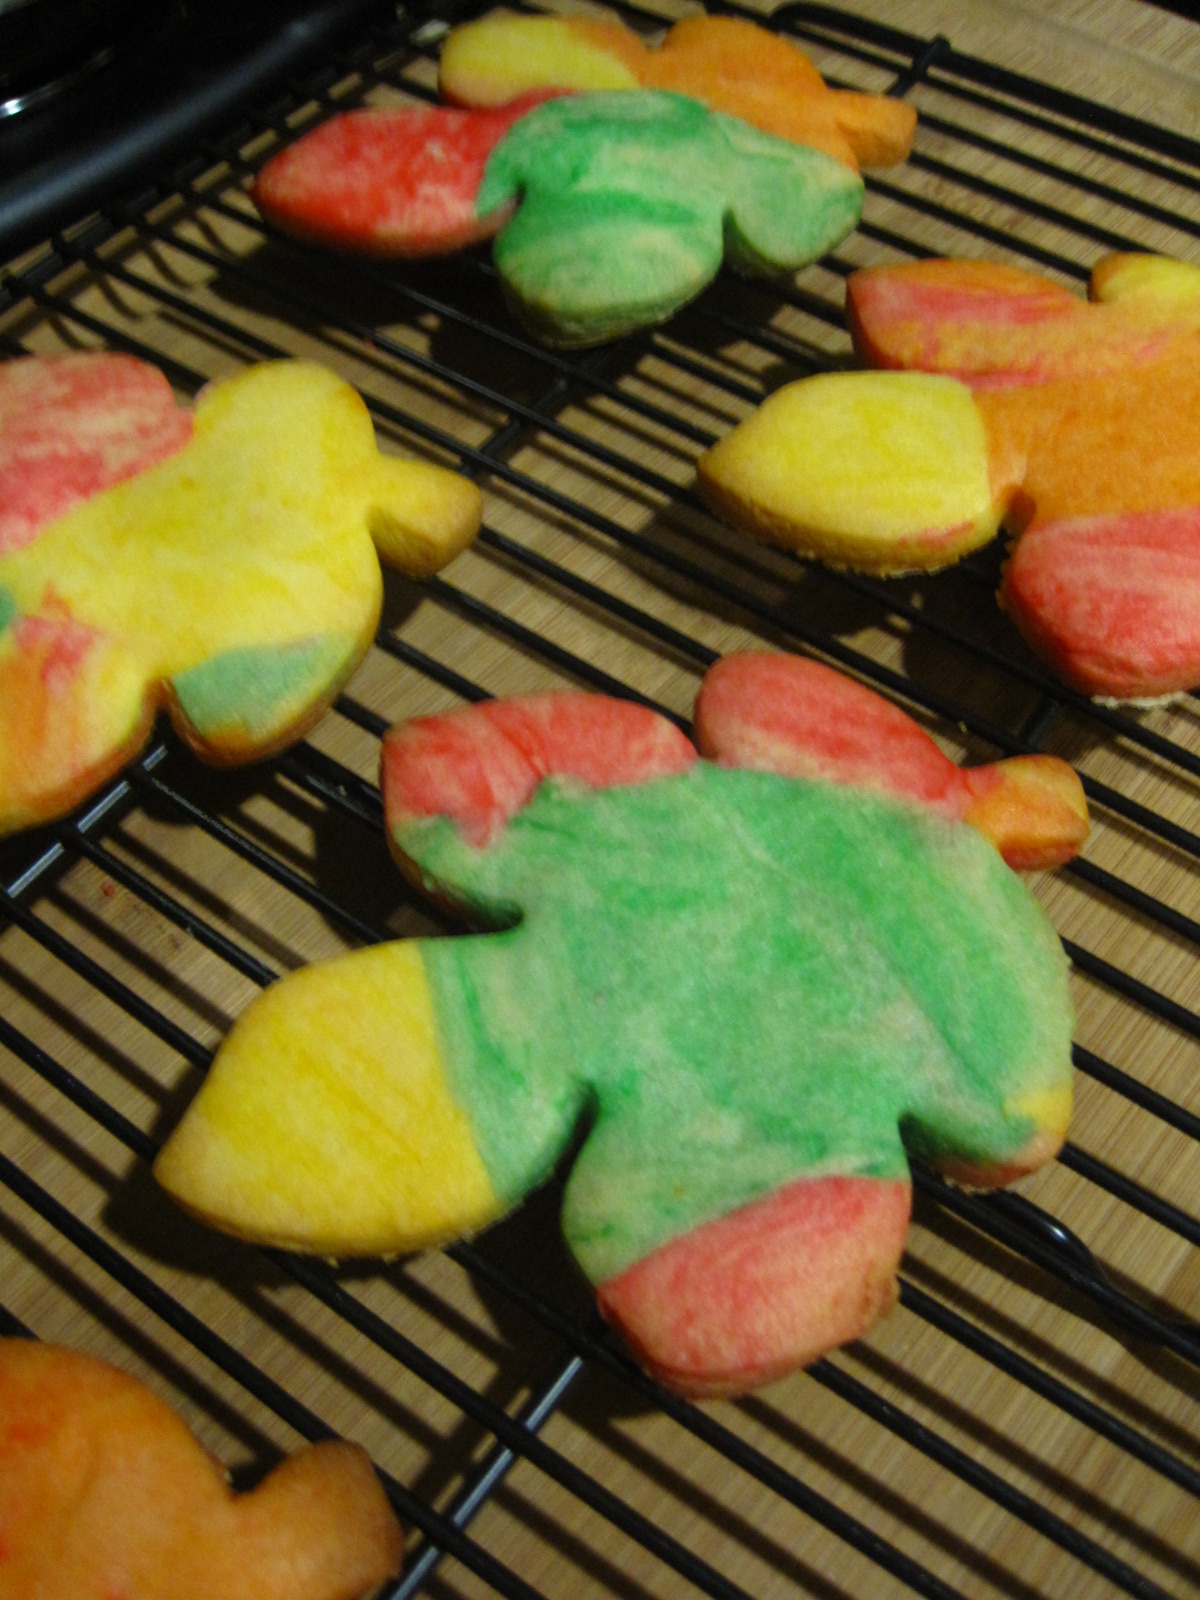


ENJOY!!

Halloween ghost cookies

So this post is super late. But maybe this post will be helpful for next Halloween.

This ghost cookies are super simple and delicious. All you need it white chocolate, nutter butter cookies, and black decorative icing.

Melt the white chocolate using the directions on the package. Dip one side of the nutter butter in the chocolate and lay on wax paper white white chocolate side facing up on wax paper to dry. (When I did this for the first time I made the mistake of trying to dip the whole Nutter Butter in the chocolate and they ended up sticking to the wax paper and making a mess). Once all of the nutter butters have one side covered with white chocolate and they are completely dry then cover the other side with white chocolate and allow to dry on wax paper. After they are dry then use your black icing to draw on the faces. You are done! Super easy...right?!?!

Saturday, October 29, 2011

Aubie and Uga Mascot Paintings

I needed to come up with a baptism gift for my nephew. My sister is a huge UGA fan and my brother-in-law is a big Auburn fan so I decided to do alphabet paintings with the mascots, Uga and Aubie. They were very simple to do. I used a sharpie for the outlines and for the lettering and watercolor to fill in the mascots. Here are the results...


Saturday, October 22, 2011

Colorful painting

I apologize for not posting in the last few months! My husband and I moved to Columbus earlier than expected so to say the least we've been quite busy... not to mention I broke my laptop :(

Here is one of my newest paintings using acrylic. I have never painted anything like this but it's a great way to add color to a boring beige apartment wall.


Saturday, August 27, 2011

DIY Table Chart

Materials- Corkboard, paint (optional), business card sheets, pushpins, a printer or pen, stickers (optional)

I used an unused old cork board that was laying around my house. I then painted the ugly frame of the cork board a bright white to make it look new. I printed the names of all the guests on the front of the business cards using a computer printer and then placed a sticker of their table number on the back. Then I attached each business card to the board with decorative push pins found at Michael's. And I attached some short directions in the center top of the board "Please find your name and look at the back." I displayed the board on a black decorative table easel  with candles, roses and a picture of the two of us. It turned out beautiful! 


Thursday, August 18, 2011

diy wedding tree guestbook

A personalized wedding tree "guest book" is a wonderful way for your guests to have some fun. Unlike many guest books that just sit in a closet collecting dust, my husband and I have our "guest book" hanging on the wall so that we can enjoy looking at it everyday. 

I bought a picture frame from JoAnn's and a cardboard piece of canvas. I had to cut the canvas down to make sure it would fit in the opening. I decided to put a canvas inside the picture frame because I knew it would be much sturdier than just using the cardboard backing that comes with the frame. After the paint dried, I drew out the tree with a pencil and then went over it with a fine point Sharpie. Last, I wrote "Our Wedding Tree" and our wedding date "5.14.11" on the bottom using a Sharpie.
I bought 3 different ink pads from Michael's so that there would be a variety of leaf colors. I made sure to have baby wipes for the guests to clean their thumbs after making a print. After they left their thumb print, they waited a few seconds for the ink to dry and then wrote their name either on the leaf print or beside the print. 
I made a chalkboard sign to include on the table for directions. ""Leaf" a thumbprint and sign your name"

After the wedding, I put the glass that came in the picture frame back in the frame to protect the tree. 


Tuesday, August 16, 2011

diy newspaper canvas art

This is an extremely easy way to display a favorite quote on the wall.

All you need is a canvas, newspaper, Elmers glue, paint brushes, and some paint.

Take the newspaper and tear into small pieces (as small or as big as you would like). Then take your glue and a paintbrush and brush the glue on the pieces of newspaper and attach to canvas. This will be messy. Allow the newspaper to dry and then lightly brush a coat of glue over the whole newspaper covered canvas (this will create a glaze over the canvas and assure that none of the newspaper will come up). After the canvas fully dries, paint your favorite quote or any other idea you have!